TeamSpeak 3 Linux Server Installation
Easy installation on Debian or Debian-based Linux operating systems is as follows. You can follow the installation steps below on current versions of Ubuntu or Debian Linux operating system. Before starting the installation, let's update the package repository of our Linux operating system and apply the applications that need to be updated, if any.
apt-get update && apt-get upgrade1. Creating a New System User
adduser --disabled-login teamspeak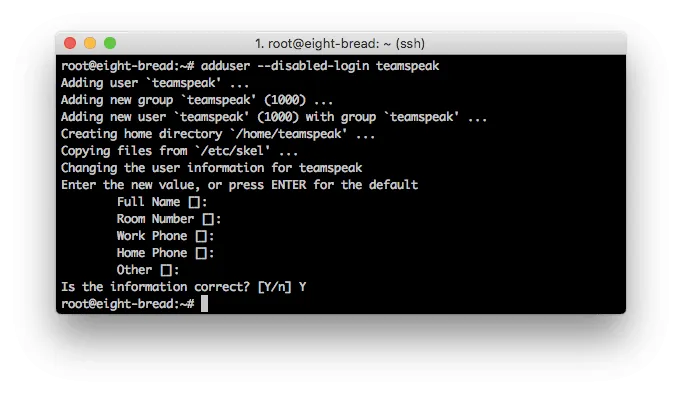
As you can see on the terminal screen above, it will ask us to enter personal user information and verify it, but we can leave all these fields blank. After this process is completed; Let's access the directory of the newly created user named "teamspeak".
cd /home/teamspeak2. TeamSpeak 3 Server download
We can copy the link of the appropriate version from the section you see in the picture below from www.teamspeak.com/en/downloads/#server and download it directly with the help of the wget tool on the Linux operating system. wget files.teamspeak-services.com/releases/server/3.13.7/teamspeak3-server_linux_amd64-3.13.7.tar.bz2 After the download is completed; tar xvf teamspeak3-server_linux_amd64-3.1.2.tar.bz2 With this command, we extract the compressed file to the directory and everything extracted; cd teamspeak3-server_linux_amd64 && mv * /home/teamspeak && cd .. && rm -rf teamspeak3-server_linux_amd64-3.1.2.tar.bz2 With this command, we move it to the directory of the "teamspeak" user we created before and delete the compressed file we opened.

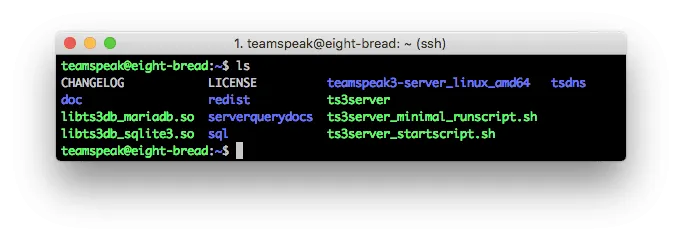
Finally, we check our directory with the ''ls'' command and if everything is done correctly, the content of our directory should be like in the terminal image above.
3. TeamSpeak 3 license agreement
We have to accept the TeamSpeak 3 server license agreement. The easiest way for me to do this is to run the following code script.
touch /home/teamspeak/.ts3server_license_acceptedAs a result; An empty file named ''.ts3server_license_accepted'' will be created in the directory.
4. Starting TeamSpeak 3 Server on Boot
We can start making TeamSpeak 3 Server settings. We need to create a file named teamspeak.service in the ''/lib/systemd/system'' directory.
sudo nano /lib/systemd/system/teamspeak.serviceWe copy and paste the following information into this file.
[Unit]
Description=TeamSpeak 3 Server
After=network.target
[Service]
WorkingDirectory=/home/teamspeak/
User=teamspeak
Group=teamspeak
Type=forking
ExecStart=/home/teamspeak/ts3server_startscript.sh start inifile=ts3server.ini
ExecStop=/home/teamspeak/ts3server_startscript.sh stop
PIDFile=/home/teamspeak/ts3server.pid
RestartSec=15
Restart=always
[Install]
WantedBy=multi-user.target
Then we exit this file by pressing the CTRL+X key combination and clicking "Save". Then, by using the two code scripts below, we will ensure that it runs automatically on the TeamSpeak 3 Server when the server is restarted.
systemctl enable teamspeak.service
systemctl start teamspeak.service
To ensure that this service is actively added to the system;
systemctl | grep teamspeak.service
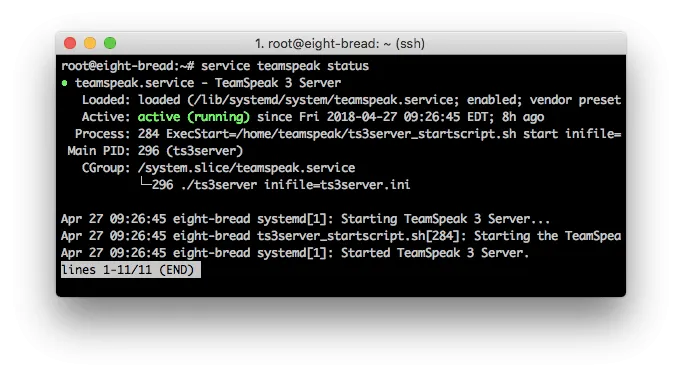
If everything is set correctly, you will see a result like the one in the terminal above. Similarly, you can check the status of TeamSpeak 3 Server by using the ''service teamspeak status'' command and getting an output from your terminal as follows:
5. Privileged Key Creation
TeamSpeak 3 Now that the server is running successfully, we can complete the most important part. We will need this privileged key when connecting to the server for the first time! To view this key, we run the code below:
cat /home/teamspeak/logs/ts3server_*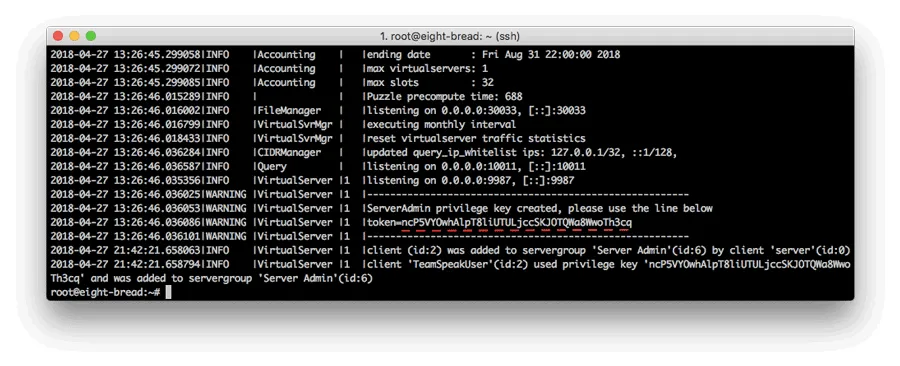
6. Connecting to TeamSpeak 3 Server - 6161 - As you can see in the picture above, we write the IP address of the server we have installed or the domain address of the server we have connected to the TeamSpeak 3 Client application, specify the Nickname and log in. After clicking Login, it will ask us to enter the Privileged Key we created above.
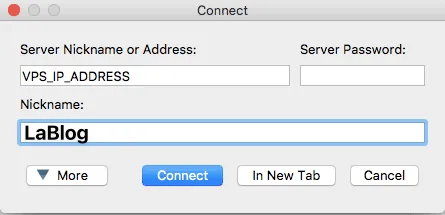
As you can see in the picture above, we write the IP address of the server we have installed or the domain address if we have connected it to the TeamSpeak 3 Client application, specify the NickName and log in. After clicking Login, it will ask us to enter the Privileged Key we created above.

After entering our Privileged Key, we have successfully connected to the TeamSpeak 3 Server we have installed.
Discord Türkiye Access is Closed!
Access to the Discord application from Turkey is restricted as of 09.10.2024. As a result, TeamSpeak server is the solution to the search for an alternative solution by people who play more games.