IpSec VPN Between Headquarters and Branch
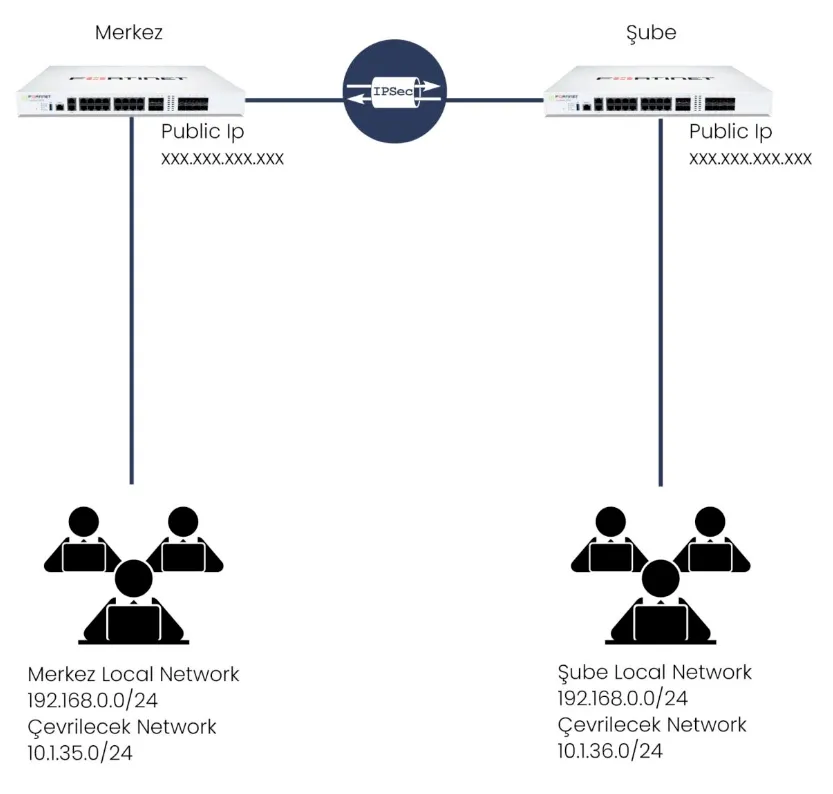
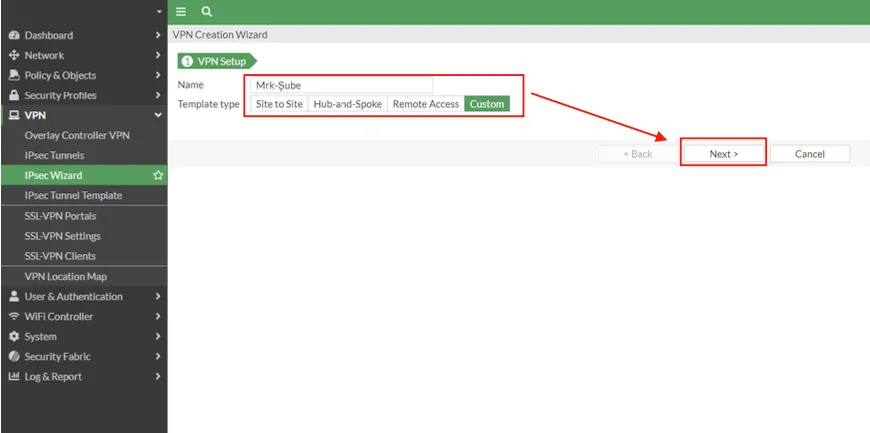
Let's start by making the IPSEC VPN connection between the HEADQUARTERS and the BRANCH. I make my VPN connection according to the topology. I click on the VPN – IPSEC wizard option, select CUSTOM from the screen that appears, specify a name in the Name section and proceed with Next.
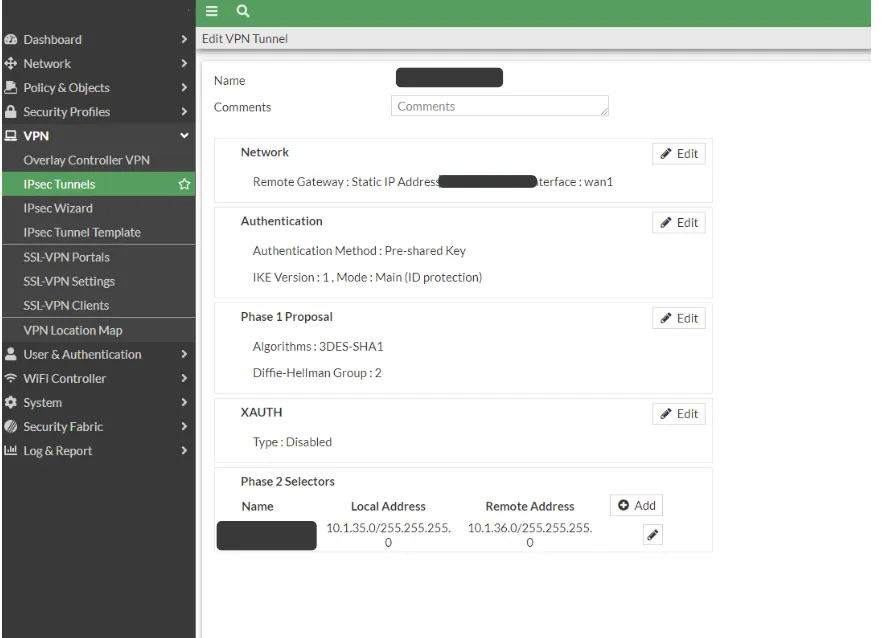
Let's enter our configuration information for our IPSEC connection in the window that appears. It should be noted that the local and remote addresses we defined in the Phase 2 selectors section are the addresses to be translated that we determined in the topology. After entering the network information in Phase 2, do not forget to select the Auto-negotiation box in the advanced section.
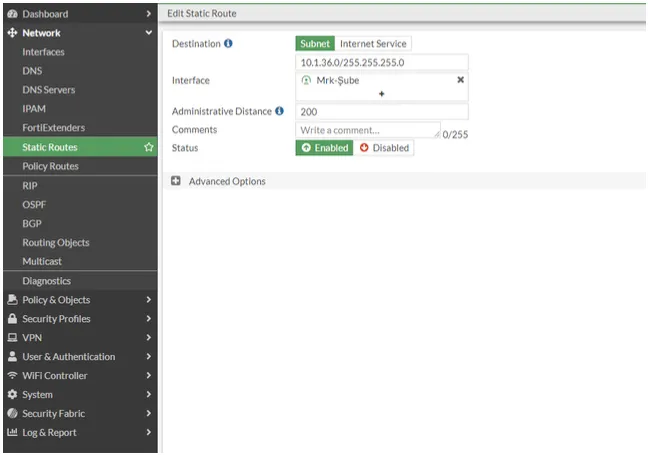
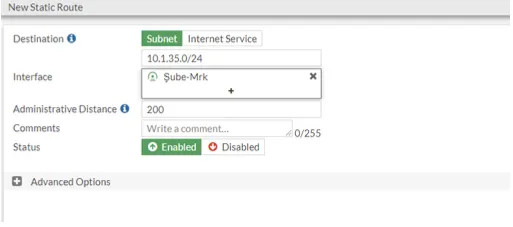
After completing our central firewall IPSEC definitions, we create a static route for the network that will go from the headquarters to the branch for VPN.
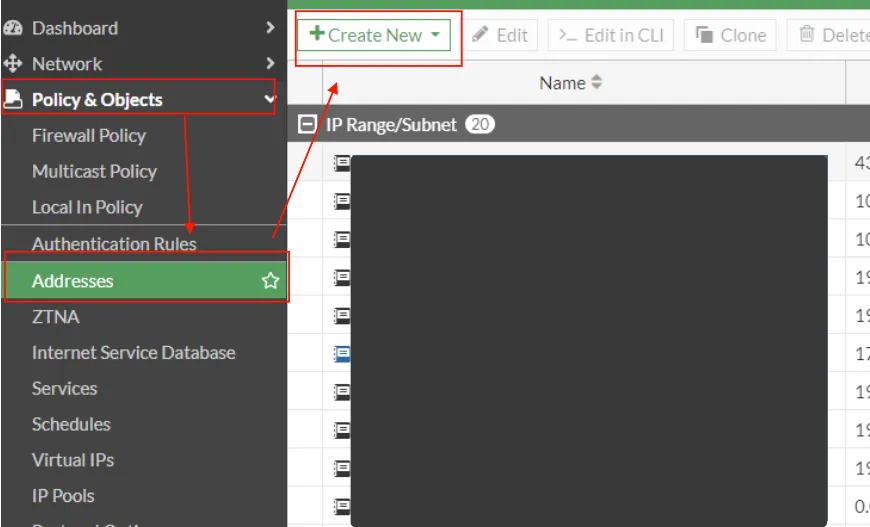
In the next step, for network and IP address definitions, we click on the addresses option under Policy & Objects and click on create new.
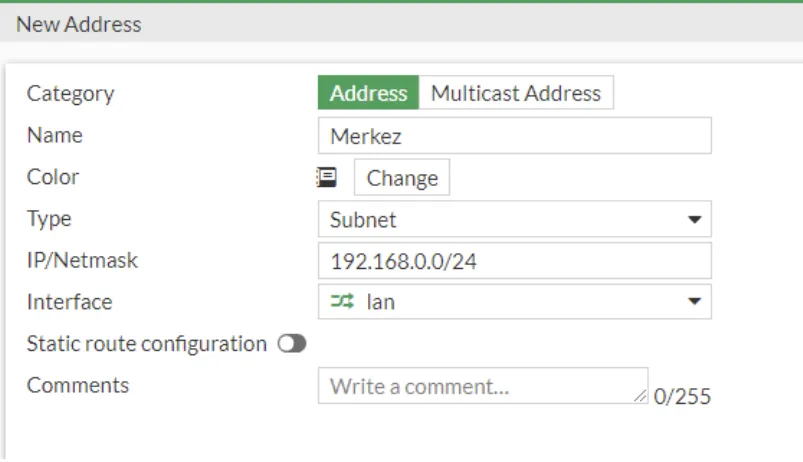
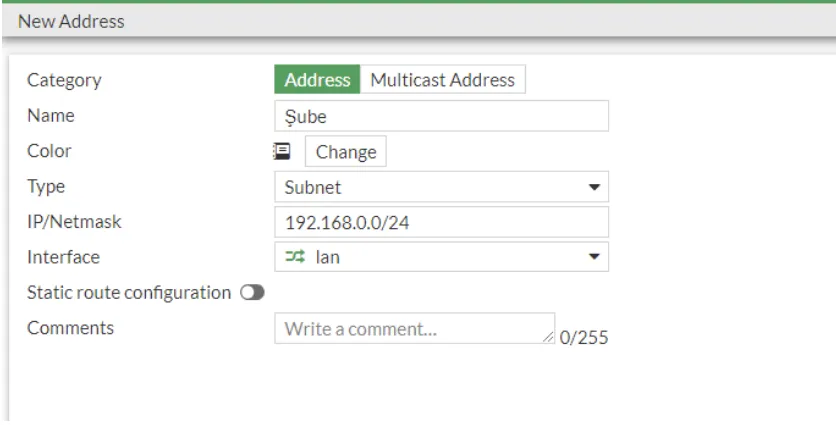
First, we enter our local network (LAN) information on the screen that appears. Don't forget to select the LAN interface from the Interface section.
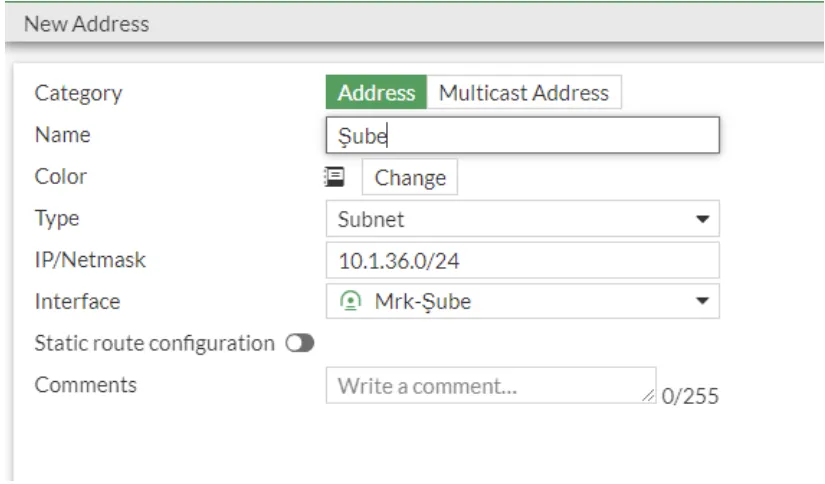
We carry out the same process on the Branch side. But here we define the network to be translated on the branch side and select the VPN interface as the Interface.
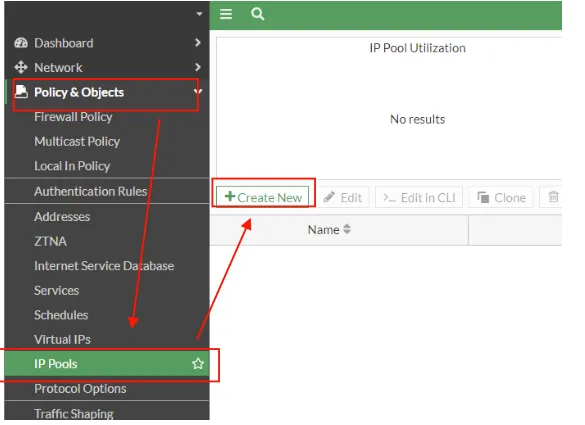
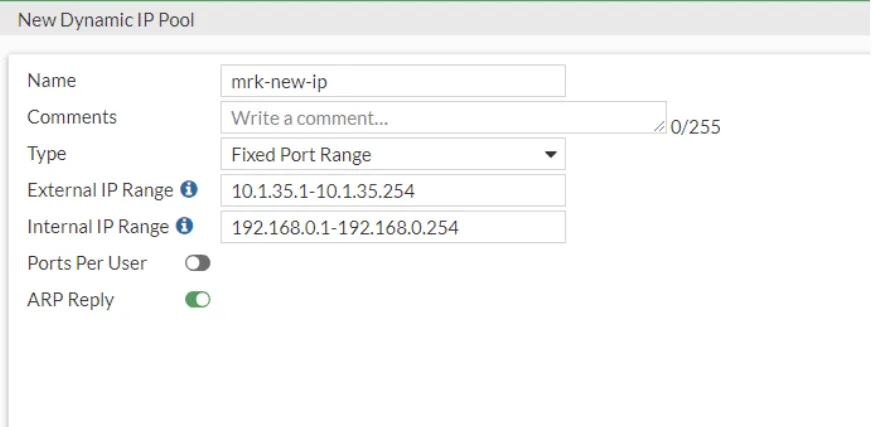
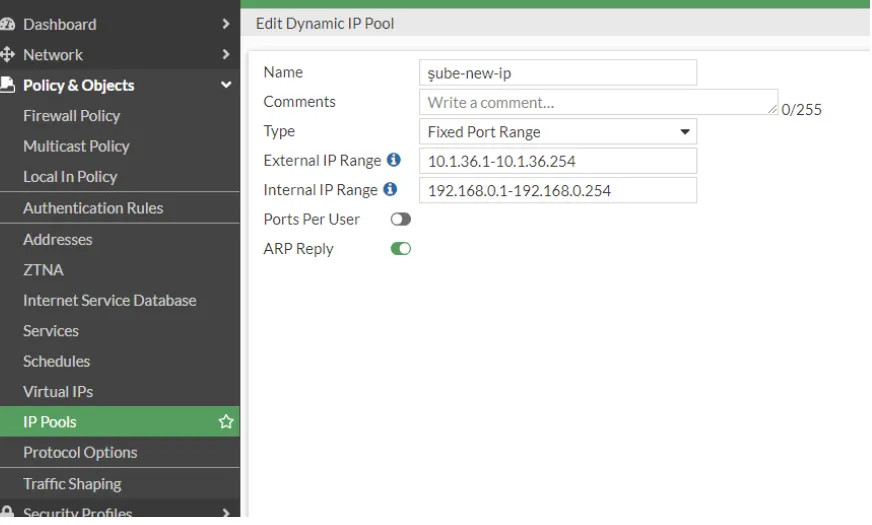
In the next step, we will create a rope pool. For this reason, we click IP pools under policy & objects to define a new IP pool from the screen that appears.
On the screen that appears, we select the Fixed Port Range option from the Type option. We enter the rope block to be turned into the center in the external part and the information of our existing rope block in the internal part.
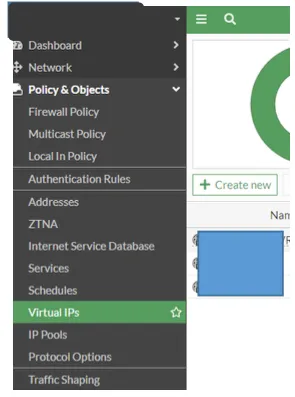
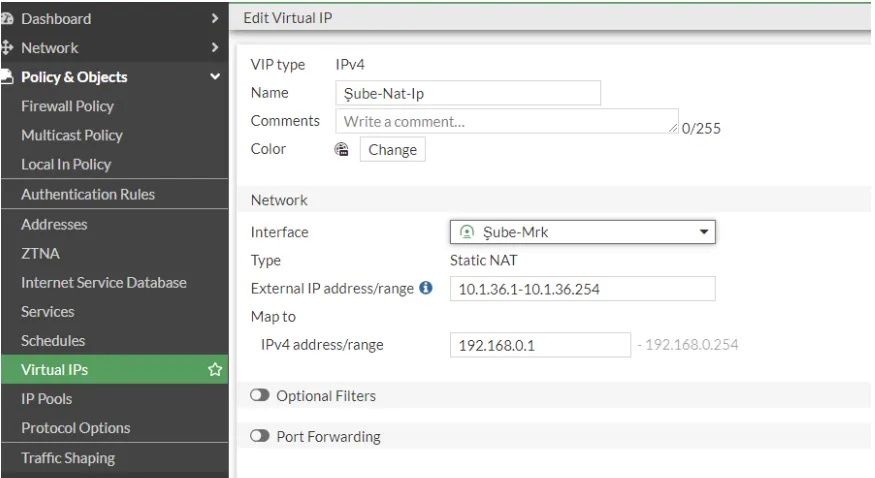
In the next step, we click Virtual IPs under Policy & Object to perform the IP conversion operations and click on the create new button to create a new definition.
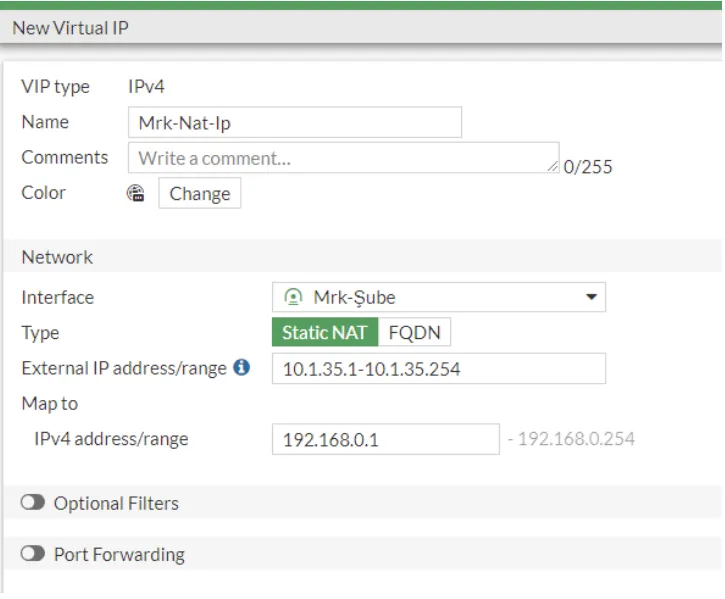
We make our definitions on the screen that appears. We choose Interface VPN. We define the ip block to be converted in the External section, and our current local ip block in the Map to section.
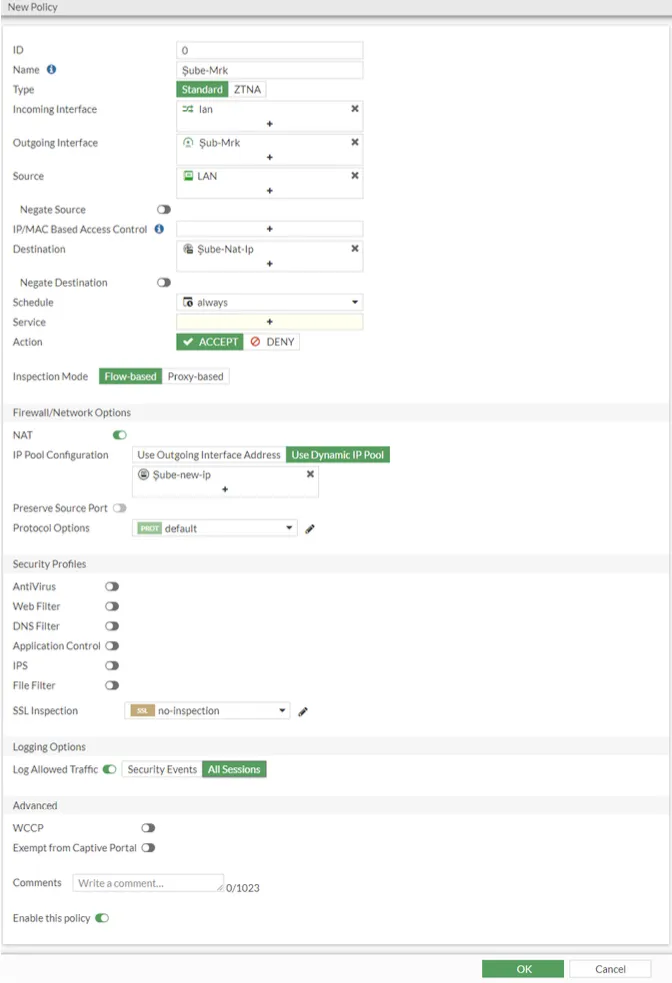
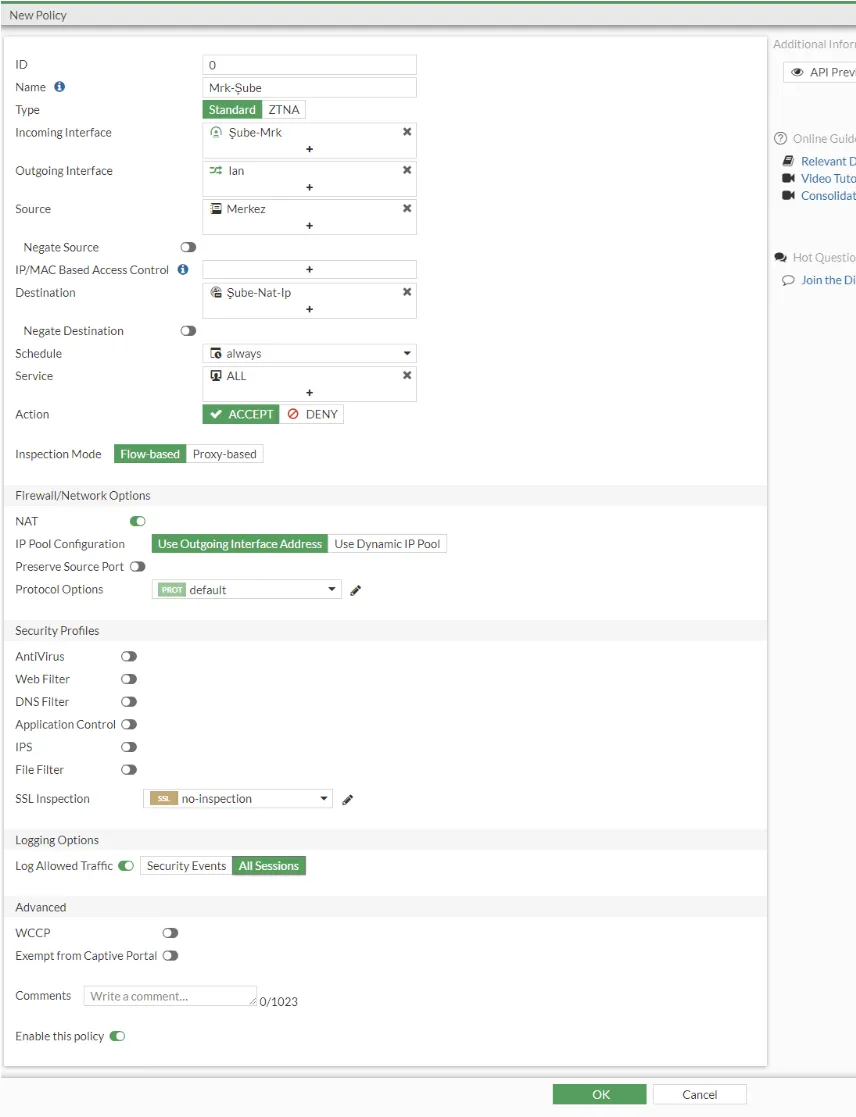
In the next step, we create a firewall policy for VPN from the headquarters to the branch and from the branch to the headquarters. What we need to pay attention to here is that NAT is on and the IP pool we created in the upper steps is selected from the Ip Pool Configuration option.
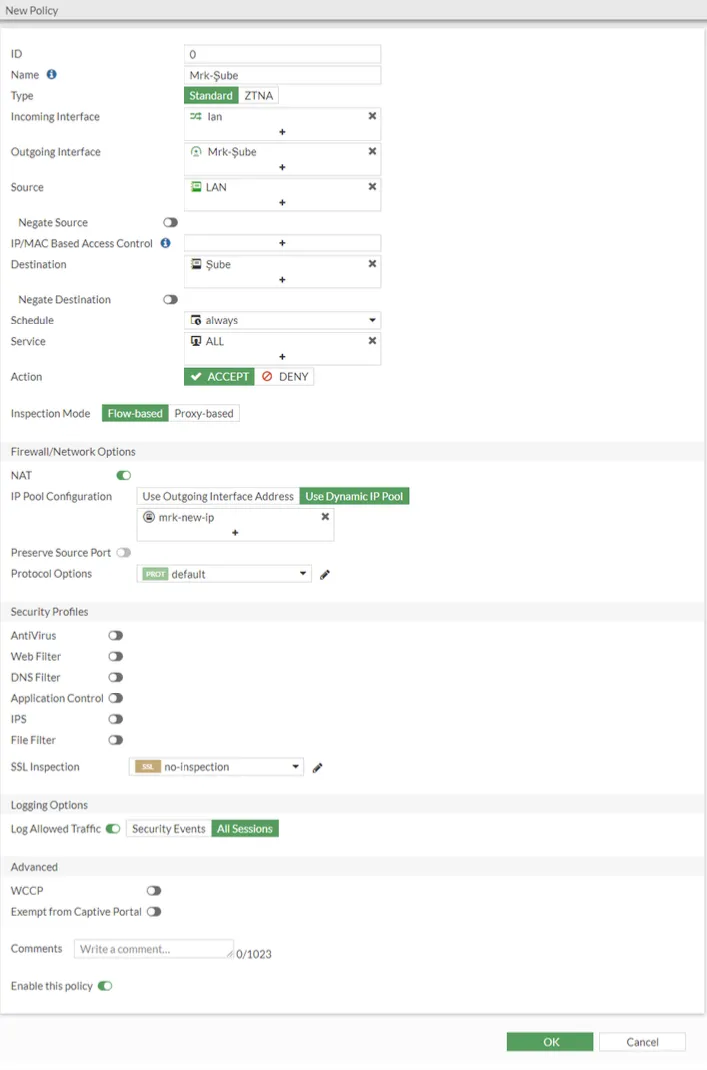
In the next step, we create another policy again. The point you should pay attention to is; Nat We keep it closed. In the Destination section, we select the rule we created in the virtual ip.
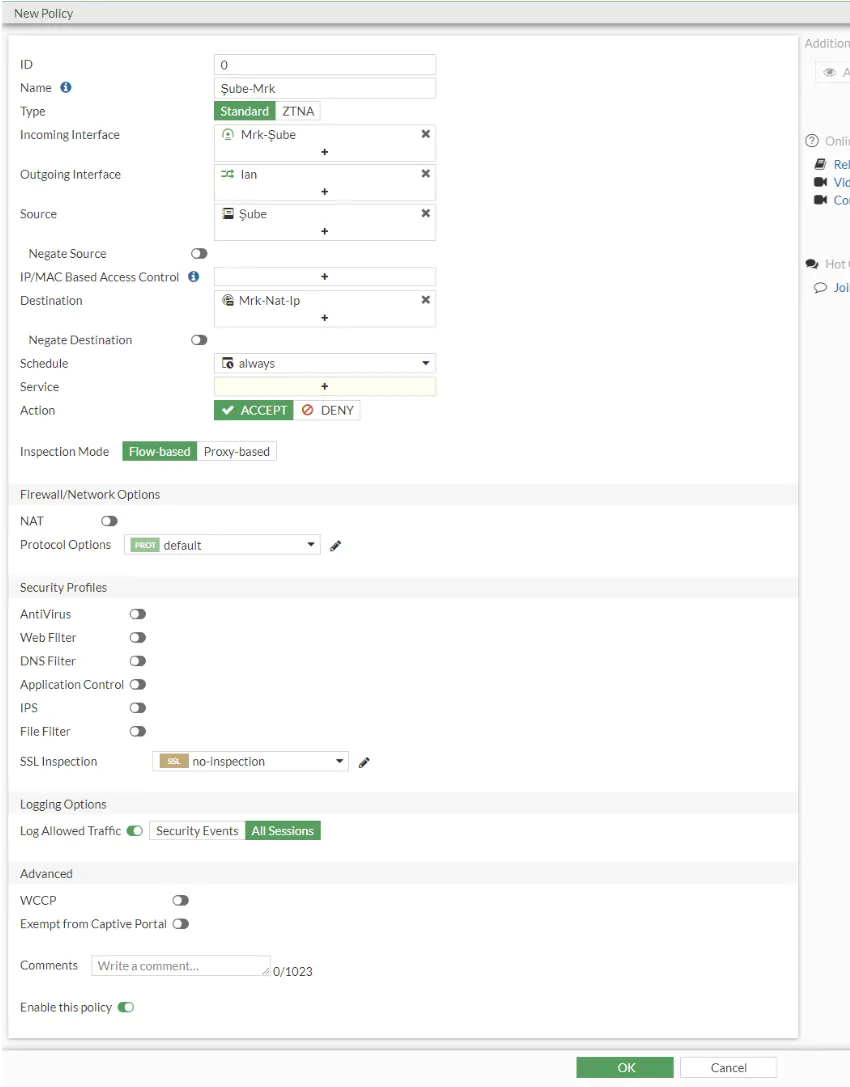
After completing our operations on our central firewall device, we perform the same operations on our Branch device. I am setting up IPsec VPN on our branch device.
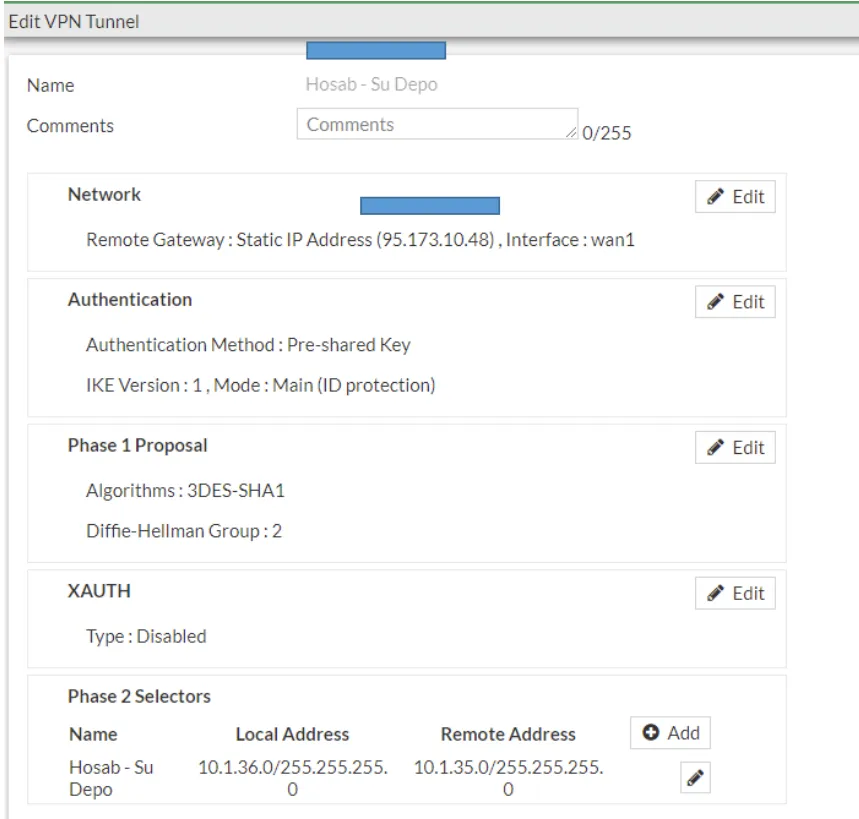
Afterwards, we create a Static route.
We define the Address on the branch device. We enter the rope block to be turned into the center.
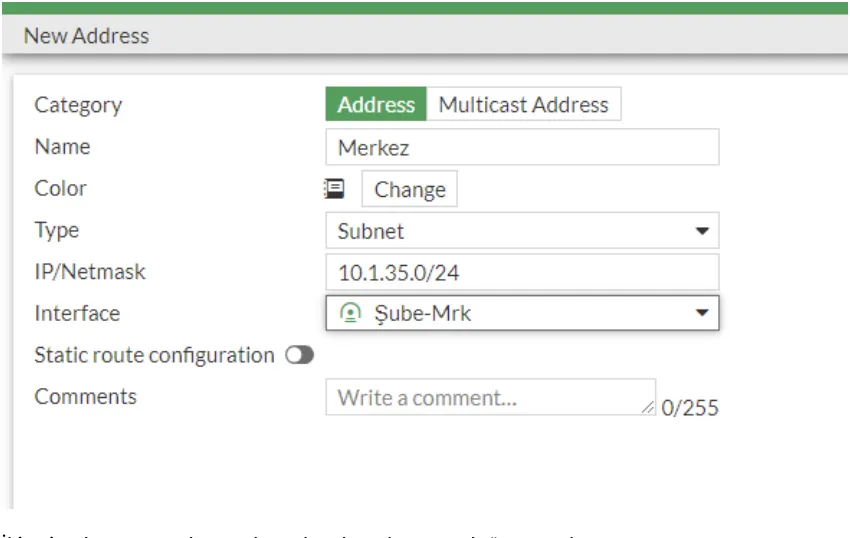
In the second address definition, we define our branch local network.
In the next step, we define the IP POOL for the branch.
In the next step, we define Virtuals IPs.
In the next step, we create our rules again. We perform the same steps above for our branch device.
In the same way, we create our cross rule. While creating our cross rule, Nat will be turned off and our Virtual IP rule will be selected in the destination section.
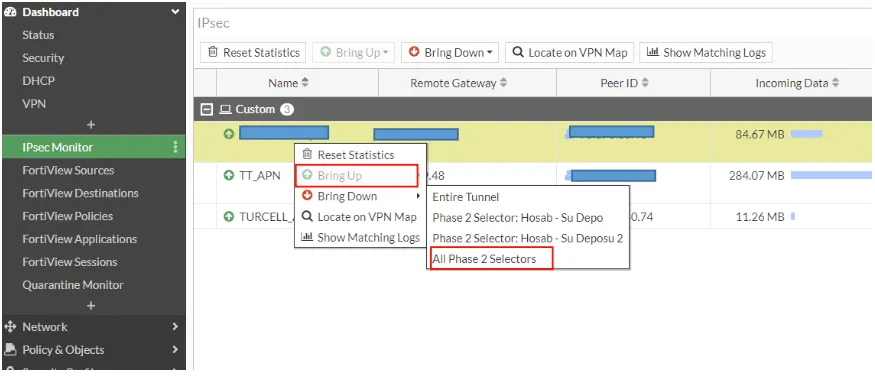
Finally, in order for our VPN to stand up, we right-click on the relevant VPN from the IPsec Monitor on both our devices and click Bring up.
We are waiting for your comments, by the way, do you know that you can test the subject explained here on your own computer with EVE-NG Full Package at labimage.com.tr?